Tuesday, June 02, 2009

Meal planning

Frozen dumplings
Seared sesame shrimp
Soba with shitake dashi

Grilled chicken breast
Green salad with roasted peppers & basil vinaigrette
Carmelized corn

Tandoori grilled chicken
Indian spiced potato salad
Mixed pickled veggies
Frozen chai

Smoked salmon
Lentil salad with feta

Sunday, September 23, 2007

Watermelon Gazpacho


During a visit to NYC, I met up with my friend Pete for lunch at Isabella's. We grabbed a table on the sidewalk and settled in to a three course fixed-price meal - a bargain for about $20 which in my case included soft shell crabs as the main dish and tiramisu for desert. The starter I chose was a fabulous Watermelon Gazpacho with blackened shrimp. When we got back to sweltering NC in the midst of 100 degree plus weather, I attempted to recreate the dish using a recipe I found. The results were pretty good, all things considered.

What we discovered is that a little gazpacho goes a long way - especially with the amount of olive oil called for in this recipe. It may be a good idea to scale back a little on the oil or plan for a very modest serving. Very tasty, but very rich. I also learned that the smell of poorly sealed watermelon gazpacho tends to permeate the entire refrigerator - causing ice and other stuff to absorb that flavor. You have been warned.

This is the recipe from the Boston Globe co-opted from the Straight Wharf Restaurant -

2 medium cucumbers, peeled, seeded, and diced (about 2 cups)
1/2 cup olive oil, plus 2 tablespoons for garnish
1/4 cup sherry vinegar, or to taste
Salt and pepper, to taste
1 tablespoon sugar, or more to taste
1 bunch scallions, thinly sliced
1/4 cup chopped fresh cilantro
2 jalapeno peppers, seeded and finely chopped
1/4 cup lime juice

1. Peel tomatoes with a serrated peeler or cut a small X in the bottom of each, blanch in boiling water for about 30 seconds, then transfer to ice water and slip off the skins. Discard seeds and chop the flesh. You should have about 4 cups.
2. Reserve 2 tablespoons tomato, 2 tablespoons watermelon, and 2 tablespoons cucumber for garnish.
3. In a food processor, combine the remaining tomato, watermelon, and cucumber. Blend until smooth. Add 1/2 cup of olive oil, sherry vinegar, salt, pepper, and sugar. Pulse to combine.
4. Transfer the mixture to a large mixing bowl. Stir in the scallions, cilantro, jalapeno peppers, and lime juice. Taste for seasoning and add more salt or vinegar, if you like. Cover and refrigerate for several hours or until chilled.
5. Ladle the gazpacho into 8 bowls. Garnish each with remaining chopped tomatoes, watermelon, cucumbers, and a drizzle of olive oil.

Sunday, June 10, 2007

Cedar Plank Tilapia


We bought some cedar planks at the Carrboro Farmer's Market with the intent to grill some type of fish. I was somewhat familiar with the concept of grilling trout but since tilapia was on super special at the Teeter, the choice was made for us. I'll have to admit I was more than a bit skeptical about the impact the cedar would have on the taste. I've grilled with hickory chips before and always love the taste charcoal grilling gives -but always felt that these were more nuances than the main show.

We marinated the tilapia fillets in Scott's Barbeque sauce (Scott's is good for more than just pork and chicken) for a couple hours prior to grilling. I thought that with a sauce that powerful, we'd barely be able to tell the difference between plank grilling or normal grilling. Boy, was I wrong. The tilapia just soaked up the cedar smokiness and served as a wonderful compliment to the marinade.

The following are the instructions --

Soak the cedar plank well - ideally at least a few hours, but the longer the better. Set up the grill for direct grilling on medium-high. When ready to cook, place the plank on the hot grate and leave it until there is a smell of smoke, about 3 to 4 minutes. Turn the plank over and place the fish on top. Cover the grill and cook until the fish is cooked through, reaching an internal temperature of 135 degrees. Check the plank occasionally - if the edges start to catch fire, mist with water, or move the plank to a cooler part of the grill. Cooking time will probably be about 20-25 minutes.

Saturday, June 09, 2007

Grilled stuffed chicken breasts


It's not really a big secret - but we eat a lot of chicken. To prevent chicken fatigue, sometimes it's necessary to kick things up a notch and take the old-school grilled chicken breast to a new level. With some sage advice from my grilling mentor Steven Raichlen - we tweaked his basic recipe just a bit with some really tasty results.

Ingredients
3 -4 large chicken breasts
7-8 large basil leaves or equivalent
5-6 pieces of sun dried tomatoes
1 chunk of asiago cheese

Marinade
1 cup olive oil
juice from 1 lemon
2-3 crushed garlic cloves
salt
pepper

Trim the "tenderloins" and any fat off the chicken breasts and cut each breast in half. Place each half flat on a cutting board and, using the palm of one hand to hold the breast flat, cut a deep horizontal pocket in the side with a slender knife. Make the pocket as large as you can without piercing the top or bottom of the breast. As for the stuffing, we chose to use asiago cheese, fresh lemon basil leaves, and sun-dried tomatoes - but pretty much anything within reason would work. Insert the stuffing into the pocket and seal the breast with toothpicks. Lay the breasts in a flat pan and cover with the marinade, flipping a couple times to coat both sides. We marinated for 20-30 minutes, but the real flavor comes from the stuffing. Grilling time is basically the same as for normal chicken breasts - probably 10 minutes or so on medium high.

This is a really easy, quick way to spice up the usual chicken breast routine and also provides a way to show off some fancy grill marks on the outside and an impressive cross section of flavors on the inside. This is something we'll definitely be doing again.

Monday, May 28, 2007

Burger time - Blackwood Picnics


Much like there is no excuse for our recent lapse in posts, there is no excuse for eating a dry, tasteless, boring burger when there are some very easy and tasty alternatives. I picked up some ground bison at the Carrboro Farmer's Market as a different twist - usually, we steer towards turkey burgers but on occasion I'll partake of some old fashioned red meat. The trick with an extra lean type of meat like bison (or extra lean turkey/beef ) - is how to preserve that juiciness a true burger connoisseur expects. We start with this mixture - the egg provides that extra moisture and helps to bind things together for better patty formation:

1 pound ground bison
1/2 cup bread crumbs
1 egg
salt
pepper

The secret ingredient, however, is a pat of flavored butter. Once the meat mixture is done and the patties have been formed, you separate each patty into two halves, insert the butter in the middle and seal things back up again. The same trick can also be used with blue cheese (especially good with turkey) - but this time out, rosemary butter was the condiment of choice. Once the burgers were grilled to satisfaction, the spread was completed with a ciabatta bread roll, fresh lettuce and tomatoes from the farmer's market, pickles, ketchup, and a little bit of mayo and mustard. I know we're in North Carolina, but chili and slaw has no place on this burger.

And although it's not in season yet - we picked up some corn from the HT to throw on the grill as well. Similarly, butter application is the key to good grilled corn. Remove the corn silk and jam some flavored butter inside the husk, as well as salt and pepper. Throw the corn on the grill - husk and all, and let the grill do the work. Indirect heat is probably the better option - but lower heat will work as well.

Burgers, grilled corn, and cold beer in the backyard cannot be beat on a warm weekend afternoon. Pick yourself up some bison and get to work!

Wednesday, March 14, 2007

Pad Thai


We've had a few weeks of illness around here, and while we have been feeding ourselves reasonably well (all things considered), blogging about those nourishing meals tended to fall by the wayside. It seems we're finally back on our feet, so maybe Blackwood Eats will get back on track as well.

Jeff recently took a trip to the Silver Wok Asian Gourmet in Mariakakis Plaza and brought home some rice stick noodles and tamarind pulp. I decided to try my hand at pad thai -- it's a dish I love the idea of (spicy... peanut-ty...yum!), but often find too sweet at restaurants, so I had high hopes for the diy approach. Plus, it gave me a chance to turn to one of my most beautiful cookbooks that, sadly, I rarely use: Hot Sour Salty Sweet: a culinary journey through southeast asia, by Jeffrey Alford and Naomi Duguid (worth buying for the photography alone).

I adapted the recipe slightly: I left out the pork (which I don't eat), used fresh shrimp instead of dried (which I didn't have) and threw in some shredded savoy cabbage with the scallions (because I needed to use it up). Other than that, I followed the recipe pretty much exactly, and the result was everything I hoped for: savory, spicy-hot, with a vinegar bite tempered by a hint of sweetness. Make sure to serve with all the accompaniments -- they add so much to the taste AND look great on the table!

Pad Thai
1/2 lb narrow dried rice noodles
1 1/2 T tamarind pulp
1 1/2 T soy sauce
1 1/2 T Thai fish sauce
3 large eggs
3 T peanut oil
3 cloves garlic, minced
4 oz pressed tofu, cut into narrow strips an inch long
1/4 lb shrimp, peeled and chopped a little
1/2 lb mung bean sprouts
3 scallions, chopped
1 cup shredded cabbage (optional)

Note: there's a lot of prep here, but once that's done the cooking is quick.
1) Soak the rice noodles in warm water for 20 minutes, then drain
2) Dissolve the tamarind pulp (which is thick, stringy, and mixed with big seeds) in 3 to 4 T warm water, then press through a sieve. (If you don't have it, substitute 1 T lemon juice plus 1 T water.) Mix the resulting liquid with the soy sauce and fish sauce in a small bowl.
3) Beat the eggs with a pinch of salt in another bowl.
4) Heat a large pan (or wok, if you have it) over moderately high heat and add half the oil. Stir-fry the garlic, then add the tofu and shrimp and cook just until the shrimp are pink.
5) Add the eggs and cook until they set around the shrimp and tofu (fritatta-style). Cut into big pieces, remove from pan, and set aside.
6) Add remaining oil to the pan, then stir-fry the noodles, pressing them against the pan, turning them, and pressing them again. They start out pretty hard, but soften up in about a minute. Unless you have a really big pan, you might need to do this in two batches. Remove the noodles to your serving dish.
7) In the same pan, stir-fry the scallions, bean sprouts, and cabbage just until wilted. Add the soy sauce mixture, then the reserved fritatta pieces (break them up some now). Pour over the noodles and toss to mix everything together.

Accompaniments
1/2 cucumber, seeded and thinly sliced
1 lime, cut into wedges
1/2 cup roasted peanuts, coarsely chopped
4 T chopped cilantro
Chile-Vinegar Sauce: dissolve 3 T sugar in 1/2 cup rice vinegar; add 1 small hot pepper, sliced thin

Plate up the noodles and pass the accompaniments in small bowls for each person to add to his or her taste for a delicious one-dish meal.

Friday, February 16, 2007

Grilled Tuna with Golden Beet Salad


While the food itself wasn't super fancy, we grilled up some fine looking rare tuna with a pretty simple marinade as an excuse to use some grains of paradise. The specs on the tuna itself are grains of paradise, a West African spice that is sometimes used as a substitute for black pepper. I think we found the difference to be subtle - but an excellent combination with a very basic lemon and olive oil marinade.

According to Wikipedia -- "Grains of paradise are commonly employed in the cooking styles of West Africa and North Africa, where they have been traditionally imported via caravan routes through the Sahara desert. Grains of paradise became a very fashionable substitute for black pepper in the 14th and 15th century Europe, especially in northern France, one of the most populous regions in Europe at the time. In the early modern period, the craze for the spice waned and it became more common as a flavorer for sausages and beer. Today it is largely unknown outside of West and North Africa except fas flavorers in some beers and gins.

In West African folk medicine, Grains of Paradise are valued for their warming and digestive properties. Grains of Paradise have been introduced to the Caribbean Islands, where they are used as medicine and for religious (voodoo) rites."

Saturday, February 10, 2007

Beer-can chicken


I have been intrigued by the concept of beer can chicken for some time. I made the plunge and was shocked at how easy and tasty this was. Besides just looking really cool - how many meals can you think of where a beer can is inserted into the orifice of the main course? I'll stop here and answer that question - hopefully not many, but in this case - the technique is more than just for show. There are a number of chicken grilling issues solved by this method --
  • The beer steams the chicken from the inside while the skin is crisped nicely by the dry heat of the grill
  • The fat just runs off the bird - you chicken isn't swimming in a pool of fat during the cooking process
  • The thighs and legs get the cooking time they need, while the breasts get nice and tender without being overcooked
There are a number of variations on how to cook and flavor the bird. For my first pass, I used the instructions and basic rub from Steven Raichlen who popularized the technique - but you're only limited by your imagination and the immediate availability of ingredients. I wouldn't be surprised if you saw a recipe for an Asian styled version posted here sometime in the near future.

Ingredients
# 1 large whole chicken (3 to 4 pounds)
# 3 tablespoons Basic Rub for Barbecue or your favorite dry barbecue rub
# 1 can (12 ounces) beer - I used a beer from a local brewery - Top of the Hill "Trophy Lager" since it is one of the best tasting canned beers around in my opinion.

Directions
1. Remove and discard the fat just inside the body cavities of the chicken. Remove the package of giblets, and set aside for another use. Rinse the chicken, inside and out, under cold running water. then drain and blot dry, inside and out, with paper towels. Sprinkle 1 tablespoon of the rub inside the body and neck cavities, then rub another 1 tablespoon all over the skin of the bird. If you wish, rub another 1/2 tablespoon of the mixture between the flesh and skin. Cover and refrigerate the chicken while you preheat the grill.

2. Set up the grill for indirect grilling, placing a drip pan in the center. If using a charcoal grill, preheat it to medium. If using a gas grill, preheat the grill to high; then lower the heat to medium.

3. Pop the tab on the beer can. Using a "church key"-style can opener , make 6 or 7 holes in the top of the can. Drink a few slugs of beer, leaving about 2/3 of the can full - then spoon the remaining dry rub into the beer. Holding the chicken upright, with the opening of the body cavity down, insert the beer can into the cavity.

4. When ready to cook, if using charcoal, toss half the wood chips on the coals. Oil grill grate. Stand the chicken up in the center of the hot grate, over the drip pan. Spread out the legs to form a sort of tripod, to support the bird.

5. Cover the grill and cook the chicken, until fall-off-the-bone tender - a 3- 4lb bird takes about 1hr and 15 minutes.

6. Using tongs, lift the bird to a cutting board or platter, holding a large metal spatula underneath the beer can for support. (Have the board or platter right next to the bird to make the move shorter. Be careful not to spill hot beer on yourself.) Let stand for 5 minutes before carving the meat off the upright carcass. (Toss the beer can out along with the carcass).

This is the recipe for the basic rub -
  • 1/2 cup kosher salt
  • 1/2 cup sugar
  • 1/2 cup ground black pepper
  • 1/2 cup paprika
  • 1. Combine ingredients in a bowl, and whisk them all together to mix.
    2. Store in an airtight jar.

    Yield: 2 cups.

    All in all - this was one of the tastiest chickens I've eaten - and we eat a bunch of chicken. This one gets 5 big stars and will definitely be rolled out on a regular basis.

    Friday, February 09, 2007

    Lentils with Fennel and Sausage


    The star here is the lentil-vegetable saute. We ate it with sausages for a hearty omnivorous dinner, but it would also be delicious over brown rice for a vegetarian meal. The fresh fennel adds a subtle sweetness -- add a 1/2 teaspoon fennel seeds to the sauteing vegetables if you want to increase the anise flavor. The recipe is slightly adapted from Epicurious.com.

    1 c French green dried lentils*
    4 1/2 c water
    1 fennel bulb, diced, with the fronds chopped
    3 1/2 T olive oil
    1 medium onion, finely chopped
    1 carrot, cut into 1/4-inch dice
    1/2 c broth
    3 T chopped Italian parsley
    1/2 t black pepper
    1 T red-wine vinegar
    1 T dijon mustard

    1 lb sweet or hot Italian sausage links (I used turkey)

    Bring lentils, water, and 1/2 teaspoon salt to a boil, then reduce heat and simmer, uncovered, until lentils are just tender (~20 minutes).

    Saute onion, carrot, and fennel bulb in about 3 tablespoons oil in a large saucepan over moderate heat until tender.

    Drain the cooked lentils and stir into the vegetables (see, I told you to use a large pan!). Add broth and cook until heated through. Stir in parsley, vinegar, mustard, and 1 tablespoon fennel fronds. Salt and pepper to taste.

    Meanwhile, prick sausages in a couple of places and cook until done -- I cooked them in a pan with a little red wine, but grilling would be good too. I served the lentils topped with sausage and sprinkled with remaining fennel fronds and a little romano cheese. A wonderful cold-weather dish.

    *French green lentils are smaller than regular brown ones; they hold their shape much better when cooked and have a slightly different (I'd even say "better") flavor. They are wonderful to use in a salad or any dish where you want discernible lentils, not lentil-y mush.

    Sunday, January 28, 2007

    Iraqi Jewish Meatballs


    This is a recipe from one of my favorite cookbooks, Claudia Roden's The Book of Jewish Food. Why do I love this cookbook? Well, the recipes are delicious, but there's something more to than that...

    I guess my cultural/ethnic background is muddled at best, but basically I'm an atheist Southerner with Eastern European Jewish roots on my dad's side and down-home bible-thumping roots on my mom's. Growing up, my family observed the major Jewish holidays more or less, including what traditional foods the Harris Teeter in our small town could supply ingredients for; but we also ate more than our share of spicy-vinegary pork BBQ. So why do these ancient Middle Eastern recipes speak to me? I was 16 years old the first time I tasted hummus, and I thought "I could eat this stuff every day". Nineteen years later, I feel the same way. I don't know if these flavors (lemon, garlic, mint, olive oil) are encoded on my DNA or if I was Lebanese in a past life, but this is my favorite type of food.

    So (finally getting back to the recipe!) here is an offering I would like to think is from my (far, far, removed) ancestors in the ancient Iraqi Jewish community:

    Meatballs:
    1 1/2 lbs ground meat (the traditionally lamb, I used turkey)
    1/2 finely chopped Italian parsley
    salt & pepper

    Sauce:
    3 T vegetable oil
    1 large yellow onion, chopped
    6 cloves garlic, minced
    2 fresh tomatoes, chopped (I used good-quality canned)
    juice of 1 1/2 small lemons
    1 T sugar
    1/2 cup chopped fresh mint

    Brown the meatballs in the oil over medium-high heat. Add the onions and garlic and cook until the onions are soft. Add the tomatoes, a little salt & pepper, and water just to almost cover. Simmer, uncovered, about 25 minutes until the meatballs are very tender and the sauce is reduced. Add the lemon juice, sugar, and mint and simmer another 10 to 15 minutes. Serve over rice.

    Wednesday, January 03, 2007

    Grilled Portobellos


    After a long, hard day of corporate nonsense, I found myself very hungry and looking for an excuse to change the course of the day. My avenue of escape was the local Harris Teeter. For Christmas, I received The Complete Illustrated Book of Barbecue Techniques by Steven Raichlen and had been looking for an excuse to grill something new and tasty. The 5 frisbee-sized portobellos on sale for $4 were a perfect option. I picked up the 'shrooms, some broccoli to grill, and some funky green bamboo rice and went to work. I used the following recipe for the mushrooms --

    4 large portobello mushrooms (8-10 oz each)
    2 cloves of garlic cut into slivers
    1 oz Romano or comparable firm cheese cut into slivers
    1 sprig fresh rosemary
    2 tablespoons pine nuts
    1/2 cup balsamic vinegar
    1/2 teaspoon kosher or sea salt
    1/2 teaspoon black pepper
    1 1/3 cups extra virgin olive oil

    Trim the stems off the mushrooms so they are flush with the caps. Poke holes into the gill side of the mushrooms inserting the slivers of garlic, cheese, rosemary, and pine nuts into the holes. Mix the balsamic vinegar, salt, and pepper (add basil if desired). Place the mushrooms in a baking dish gill side up and pour the marinade on top of the shrooms making sure to coat the bottoms as well. Marinate for somewhere between 30 mins and 3 hrs to maximize the flavor sensation.

    When it's grilling time - hit them for about 3 mins face side down on high and flip them on their backs for another 4-6 mins. If you're feeling like a grilling superstar - you can turn at a 45 degree angle after about 2 mins to work some grill marks.

    I was extremely pleased at how well these turned out and will definitely make this a regular in the dinner rotation. Plugging the ingredients into the 'shrooms takes a little bit of time but pays off big in flavor points. I'll give this one 5 stars.

    Tuesday, January 02, 2007

    Biscuits for 2007

    3 c flour (I used 2 c all-purpose and 1 c "white whole wheat" with excellent results)
    1 T + 1 t baking powder
    1 t salt
    1 t baking soda
    3/4 cup chilled unsalted butter
    1 cup buttermilk

    Preheat oven to 425°F. Mix flour, baking powder, salt and baking soda in large bowl to blend. Using fingertips, rub 3/4 cup chilled butter into dry ingredients until mixture resembles coarse meal. Add buttermilk and stir until evenly moistened. Roll dough to 1/2 inch thickness and cut out biscuits. Bake until biscuits are golden brown on top, about 15-18 minutes.

    For a hungry horde on the first morning of the year, I doubled the recipe, added about 2 cups of shredded cheese, and cut out about 50 mini-biscuits (about 1 1/2 inch diameter). Yum.

    Here's to many more delicious meals with friends and family in 2007!

    Thursday, December 14, 2006

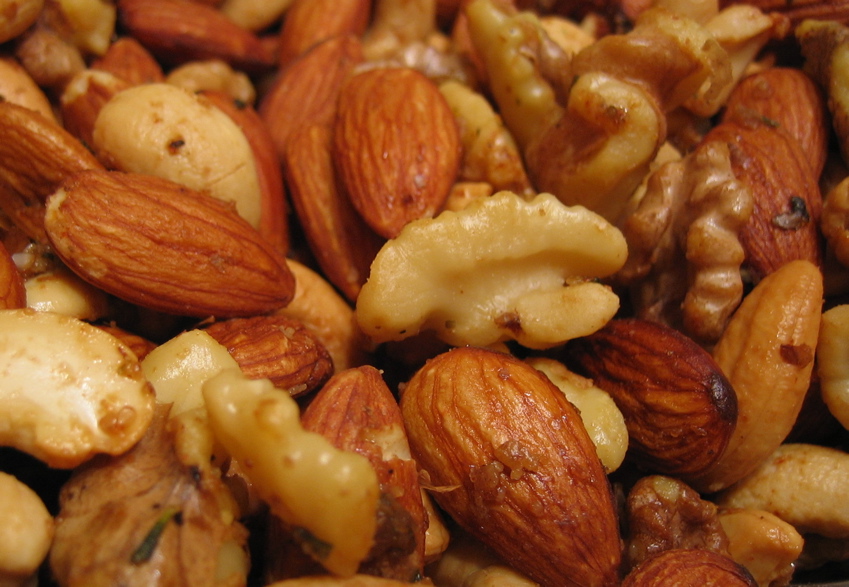
    Party Nuts!

    No - not the guys passed out in a pile of beer cans... I'm talking about these:


    From The Union Square Cafe Cookbook:

    1 1/4 lbs unsalted nuts (I used walnuts, almonds, and cashews)
    2 T chopped fresh rosemary
    1/2 t cayenne pepper
    2 t dark brown sugar
    2 t kosher salt
    1 T butter, melted

    Preheat oven to 350 F. Toast the nuts in a single layer on a cookie sheet until just starting to turn light golden brown (10 minutes or less). Mix the other ingredients with the butter in a large bowl. Toss the nuts with the spiced butter and serve while still warm.

    I'm in love! These are soooo easy and really really delicious! A new party favorite.

    Friday, December 01, 2006

    Pumpkin Apricot Cake

    This is a light, moist cake which I *highly* recommend for apricot fans. I made it for Thanksgiving, but it's not as pumpkin-y autumnal tasting as I expected. Here I decorated with dried apricots cut into leaf shapes, but if you cut the apricots into flowers, I think it would be a fine cake for a spring event (birthday, wedding or baby shower, or what-have-you).

    Recipe is from Epicurious.com.

    First, make this Apricot Puree
    1 1/4 c apricot nectar
    6 oz dried apricots
    Simmer together for 5-10 minutes until apricots are soft, then puree in food processor or blender. Let cool. Leftovers are great on toast or pancakes.

    Cake

    2 c cake flour (this is worth buying, really!)
    2 t baking powder
    2 t ground cinnamon
    1/2 t ground allspice
    1/2 t baking soda
    1/4 t salt
    1/2 c Apricot Puree
    3/4 c canned solid pack pumpkin
    1/4 c buttermilk
    3/4 c unsalted butter, room temperature
    1 1/2 c sugar
    3 large eggs
    2 t vanilla extract

    Preheat oven to 350° F. Butter two 8-inch cake pans, line with parchment paper, butter again, then dust pans with flour. Mix first 6 ingredients in medium bowl. Blend Apricot Puree, pumpkin and buttermilk in small bowl. Using an electric mixer, beat butter in large bowl until fluffy. Gradually add the sugar, beating until well blended. Add eggs 1 at a time, beating well after each. Mix in vanilla. Mix in dry ingredients alternately with pumpkin mixture, beginning and ending with dry ingredients. Divide batter equally between prepared pans. Smooth tops. Bake cakes until a toothpick inserted into center comes out clean, about 30 minutes. Cool in the pans for 10 minutes, then turn out on wire rack to finish cooling.

    Apricot Cream Cheese Frosting
    1 lb cream cheese, room temperature (I used light cream cheese)
    2 c powdered sugar
    1/2 c Apricot Puree
    1/3 c canned solid pack pumpkin

    Beat cream cheese and sugar in medium bowl with an electric mixer until fluffy. Add Apricot Puree and pumpkin and beat until blended.

    For garnish, press dried apricots between two sheets of wax paper using a rolling pin (a wine bottle works, too). Cut into shapes using clean scissors or small cookie-cutters.

    5 stars - it's a little work, but worth it for a special occasion.

    Thursday, November 23, 2006

    Herbed Turkey Breast with Cider Gravy


    Impress your (carnivorous) friends and family! Roast a turkey breast -- it's so good you won't want to wait 'til Thanksgiving. This makes a delicious dinner and equally delicious sandwiches the rest of the week.

    One 4 lb turkey breast

    Zest of one lemon
    15-20 fresh sage leaves
    Large handful fresh parsley
    2 T fresh thyme
    1 t salt
    Freshly ground black pepper
    4 T butter, at room temperature

    Small yellow onion, peeled and quartered
    1 orange, washed and quartered
    4-6 cloves of garlic, peeled and cut in half
    2-3 bay leaves

    Preheat the oven to 425 degrees F. Oil a roasting pan just big enough for the turkey breast.

    Mince the lemon zest and herbs and mix into the butter along with salt and a couple grinds of pepper.

    Rinse and dry your turkey breast. Carefully run your fingers between the skin and the flesh from one end, being careful not to pull it completely off, creating a pocket. Rub the herb butter under the skin on each side, spreading it evenly. Season the turkey breasts generously inside and out with salt and pepper. Place the onion, orange, and garlic in the cavity, along with a few bay leaves and some extra sprigs of sage, thyme, and parsley.

    Place the turkey in the oven and roast for 25-30 minutes, until it’s started to brown nicely. Decrease the temperature to 400 degrees and roast for another 50 minutes or so, until a meat thermometer reads 175 degrees.

    Remove from the oven, transfer to a platter, cover, and let rest for 10 minutes before carving. Do NOT wash the pan yet - you need the drippings to make the gravy. Don't be scared! Good gravy is easier than you think:

    1 1/2 c apple cider (or so)
    1 T butter
    4 T all-purpose flour
    1/4 c white wine
    tiny bit of lemon juice

    Pour the juices from the roasting pan into a measuring cup. Let stand for a few minutes to allow fat to rise to top, then skim fat off. Add apple cider to pan juices in measuring cup to total 2 cups of liquid.

    Melt butter in a small saucepan. Add flour and whisk thoroughly to get out any lumps. Cook over medium heat for a few minutes until just starting to turn tan-colored. Add white wine and whisk it in. Add the pan juices/cider mixture and whisk until completely smooth. Bring to a simmer, and stir until thickened. Season with salt, pepper, and a small squeeze of lemon juice to taste.

    Slice the turkey breast and serve with gravy.

    Sunday, November 05, 2006

    Grilled Salmon and Potato Pomegranate Salad


    Being the shameless Harris Teeter bargain shopper that I am, I came across some strong value plays for both Alaskan Sockeye Salmon and pomegranates. As far as cooking them up, the salmon was pretty intuitive but I had to work a little more to find something to make with pomegranates

    Rating wise - I'm giving the Salmon 4 stars and the Potato/Pomegranate salad 3 stars . The salmon was bursting with flavor and easy to prepare. The salad was very tasty as well and very distinctive looking but honestly, I'd probably prefer a kickin' more traditional potato salad instead.

    Grilled Salmon
    Take a large fillet of salmon and cut into pieces and marinade in 1/3 cup soy sauce and 1/3 cup maple syrup in a flat dish flesh side down. After marinating for about an hour - grill on high on ye old gas grill for 3 mins a side.

    Potato Pomegranate Salad
    2 pounds red potatoes, scrubbed
    1/2 cup sour cream
    2 tablespoons red wine vinegar
    salt and freshly ground pepper
    1 red onion, diced
    1 stalk celery, diced
    1 apple, peeled, cored and diced
    1/2 cup pomegranate seeds
    1/4 cup extra-virgin olive oil

    Place the potatoes in a pot, and add enough cold water to cover. Bring to a boil, and cook until fork-tender, about 15 minutes. Meanwhile, in a large bowl, combine the sour cream and vinegar, season with salt and pepper, mix, and set aside. Drain the potatoes, and add to the bowl with the sour cream mixture. Using a fork, lightly press down on the potatoes to slightly mash them as you mix. Add the celery, apple and pomegranate seeds, and toss well. Drizzle with the olive oil, and adjust seasonings.

    Sunday, October 22, 2006

    Blueberry Waffles


    1 1/2 c all-purpose flour
    1/2 T baking powder
    1/2 t baking soda
    1/2 t salt
    1 1/4 c yogurt, thinned with 1/2 c water
    4 T butter, melted and cooled
    1/4 c ground flax seeds
    2 large eggs, beaten
    small handful of blueberries (fresh or frozen)
    maple syrup

    Preheat waffle iron. On old-fashioned waffle makers (like that hand-me-down from your parents), it's ready to use when the light goes OFF.

    In a large bowl whisk together flour, baking powder, baking soda, and salt. Mix together thinned yogurt, butter, flax seed, and eggs. Add wet ingredients to dry and stir just until smooth (the batter will be very thick, that's ok). Fold in berries.

    Grease the waffle iron (Pam is really the way to go for this). Spoon a scant cup of batter onto the waffle iron and spread it out fairly evenly. Close the lid. The waffle should be ready when it stops steaming (and the light will probably go off again, but it's best to judge by the steam). Serve with maple syrup, butter, and more berries.

    Very easy and better than what you'd get at Breadmen's.
    5 star breakfast.

    Saturday, October 21, 2006

    Omelet & Hashbrowns


    I adhere to a 'rule of three' in omelet preparation when it comes to ingredients. Fewer are acceptable but generally, three ingredients provide just the right mix of flavor sensations - more than that and things just get confusing. This omelet pushed the boundaries in a number of ways but when you get down to it, was still a cheese, mushroom, and sausage omelet.

    These are the rule stretching ingredients used for this particularly delicious omelet --
    • Sausage (Asiago chicken sausage with vegetables)
    • Mushrooms (Shitake mushrooms sauteed lightly in butter and garlic)
    • Cheese (Rocchetta - a combination of cow & goat cheese)
    Although this is a very simple meal I'm giving it 5 stars just because it was that tasty.

    BLT and tater tots

    I never said we cooked every night.

    Sunday, October 15, 2006