Showing posts with label grilling. Show all posts

Saturday, June 09, 2007

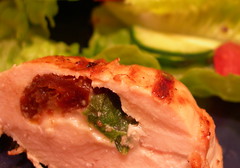
Grilled stuffed chicken breasts


It's not really a big secret - but we eat a lot of chicken. To prevent chicken fatigue, sometimes it's necessary to kick things up a notch and take the old-school grilled chicken breast to a new level. With some sage advice from my grilling mentor Steven Raichlen - we tweaked his basic recipe just a bit with some really tasty results.

Ingredients
3 -4 large chicken breasts
7-8 large basil leaves or equivalent
5-6 pieces of sun dried tomatoes
1 chunk of asiago cheese

Marinade
1 cup olive oil
juice from 1 lemon
2-3 crushed garlic cloves
salt
pepper

Trim the "tenderloins" and any fat off the chicken breasts and cut each breast in half. Place each half flat on a cutting board and, using the palm of one hand to hold the breast flat, cut a deep horizontal pocket in the side with a slender knife. Make the pocket as large as you can without piercing the top or bottom of the breast. As for the stuffing, we chose to use asiago cheese, fresh lemon basil leaves, and sun-dried tomatoes - but pretty much anything within reason would work. Insert the stuffing into the pocket and seal the breast with toothpicks. Lay the breasts in a flat pan and cover with the marinade, flipping a couple times to coat both sides. We marinated for 20-30 minutes, but the real flavor comes from the stuffing. Grilling time is basically the same as for normal chicken breasts - probably 10 minutes or so on medium high.

This is a really easy, quick way to spice up the usual chicken breast routine and also provides a way to show off some fancy grill marks on the outside and an impressive cross section of flavors on the inside. This is something we'll definitely be doing again.

Monday, May 28, 2007

Burger time - Blackwood Picnics


Much like there is no excuse for our recent lapse in posts, there is no excuse for eating a dry, tasteless, boring burger when there are some very easy and tasty alternatives. I picked up some ground bison at the Carrboro Farmer's Market as a different twist - usually, we steer towards turkey burgers but on occasion I'll partake of some old fashioned red meat. The trick with an extra lean type of meat like bison (or extra lean turkey/beef ) - is how to preserve that juiciness a true burger connoisseur expects. We start with this mixture - the egg provides that extra moisture and helps to bind things together for better patty formation:

1 pound ground bison
1/2 cup bread crumbs
1 egg
salt
pepper

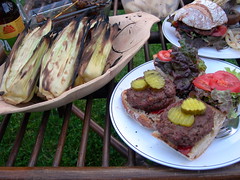
The secret ingredient, however, is a pat of flavored butter. Once the meat mixture is done and the patties have been formed, you separate each patty into two halves, insert the butter in the middle and seal things back up again. The same trick can also be used with blue cheese (especially good with turkey) - but this time out, rosemary butter was the condiment of choice. Once the burgers were grilled to satisfaction, the spread was completed with a ciabatta bread roll, fresh lettuce and tomatoes from the farmer's market, pickles, ketchup, and a little bit of mayo and mustard. I know we're in North Carolina, but chili and slaw has no place on this burger.

And although it's not in season yet - we picked up some corn from the HT to throw on the grill as well. Similarly, butter application is the key to good grilled corn. Remove the corn silk and jam some flavored butter inside the husk, as well as salt and pepper. Throw the corn on the grill - husk and all, and let the grill do the work. Indirect heat is probably the better option - but lower heat will work as well.

Burgers, grilled corn, and cold beer in the backyard cannot be beat on a warm weekend afternoon. Pick yourself up some bison and get to work!

Friday, February 16, 2007

Grilled Tuna with Golden Beet Salad


While the food itself wasn't super fancy, we grilled up some fine looking rare tuna with a pretty simple marinade as an excuse to use some grains of paradise. The specs on the tuna itself are grains of paradise, a West African spice that is sometimes used as a substitute for black pepper. I think we found the difference to be subtle - but an excellent combination with a very basic lemon and olive oil marinade.

According to Wikipedia -- "Grains of paradise are commonly employed in the cooking styles of West Africa and North Africa, where they have been traditionally imported via caravan routes through the Sahara desert. Grains of paradise became a very fashionable substitute for black pepper in the 14th and 15th century Europe, especially in northern France, one of the most populous regions in Europe at the time. In the early modern period, the craze for the spice waned and it became more common as a flavorer for sausages and beer. Today it is largely unknown outside of West and North Africa except fas flavorers in some beers and gins.

In West African folk medicine, Grains of Paradise are valued for their warming and digestive properties. Grains of Paradise have been introduced to the Caribbean Islands, where they are used as medicine and for religious (voodoo) rites."

Saturday, February 10, 2007

Beer-can chicken


I have been intrigued by the concept of beer can chicken for some time. I made the plunge and was shocked at how easy and tasty this was. Besides just looking really cool - how many meals can you think of where a beer can is inserted into the orifice of the main course? I'll stop here and answer that question - hopefully not many, but in this case - the technique is more than just for show. There are a number of chicken grilling issues solved by this method --
  • The beer steams the chicken from the inside while the skin is crisped nicely by the dry heat of the grill
  • The fat just runs off the bird - you chicken isn't swimming in a pool of fat during the cooking process
  • The thighs and legs get the cooking time they need, while the breasts get nice and tender without being overcooked
There are a number of variations on how to cook and flavor the bird. For my first pass, I used the instructions and basic rub from Steven Raichlen who popularized the technique - but you're only limited by your imagination and the immediate availability of ingredients. I wouldn't be surprised if you saw a recipe for an Asian styled version posted here sometime in the near future.

Ingredients
# 1 large whole chicken (3 to 4 pounds)
# 3 tablespoons Basic Rub for Barbecue or your favorite dry barbecue rub
# 1 can (12 ounces) beer - I used a beer from a local brewery - Top of the Hill "Trophy Lager" since it is one of the best tasting canned beers around in my opinion.

Directions
1. Remove and discard the fat just inside the body cavities of the chicken. Remove the package of giblets, and set aside for another use. Rinse the chicken, inside and out, under cold running water. then drain and blot dry, inside and out, with paper towels. Sprinkle 1 tablespoon of the rub inside the body and neck cavities, then rub another 1 tablespoon all over the skin of the bird. If you wish, rub another 1/2 tablespoon of the mixture between the flesh and skin. Cover and refrigerate the chicken while you preheat the grill.

2. Set up the grill for indirect grilling, placing a drip pan in the center. If using a charcoal grill, preheat it to medium. If using a gas grill, preheat the grill to high; then lower the heat to medium.

3. Pop the tab on the beer can. Using a "church key"-style can opener , make 6 or 7 holes in the top of the can. Drink a few slugs of beer, leaving about 2/3 of the can full - then spoon the remaining dry rub into the beer. Holding the chicken upright, with the opening of the body cavity down, insert the beer can into the cavity.

4. When ready to cook, if using charcoal, toss half the wood chips on the coals. Oil grill grate. Stand the chicken up in the center of the hot grate, over the drip pan. Spread out the legs to form a sort of tripod, to support the bird.

5. Cover the grill and cook the chicken, until fall-off-the-bone tender - a 3- 4lb bird takes about 1hr and 15 minutes.

6. Using tongs, lift the bird to a cutting board or platter, holding a large metal spatula underneath the beer can for support. (Have the board or platter right next to the bird to make the move shorter. Be careful not to spill hot beer on yourself.) Let stand for 5 minutes before carving the meat off the upright carcass. (Toss the beer can out along with the carcass).

This is the recipe for the basic rub -
  • 1/2 cup kosher salt
  • 1/2 cup sugar
  • 1/2 cup ground black pepper
  • 1/2 cup paprika
  • 1. Combine ingredients in a bowl, and whisk them all together to mix.
    2. Store in an airtight jar.

    Yield: 2 cups.

    All in all - this was one of the tastiest chickens I've eaten - and we eat a bunch of chicken. This one gets 5 big stars and will definitely be rolled out on a regular basis.
    Wednesday, January 03, 2007

    Grilled Portobellos


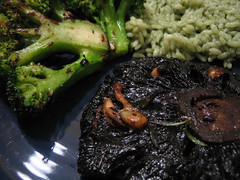
    After a long, hard day of corporate nonsense, I found myself very hungry and looking for an excuse to change the course of the day. My avenue of escape was the local Harris Teeter. For Christmas, I received The Complete Illustrated Book of Barbecue Techniques by Steven Raichlen and had been looking for an excuse to grill something new and tasty. The 5 frisbee-sized portobellos on sale for $4 were a perfect option. I picked up the 'shrooms, some broccoli to grill, and some funky green bamboo rice and went to work. I used the following recipe for the mushrooms --

    4 large portobello mushrooms (8-10 oz each)
    2 cloves of garlic cut into slivers
    1 oz Romano or comparable firm cheese cut into slivers
    1 sprig fresh rosemary
    2 tablespoons pine nuts
    1/2 cup balsamic vinegar
    1/2 teaspoon kosher or sea salt
    1/2 teaspoon black pepper
    1 1/3 cups extra virgin olive oil

    Trim the stems off the mushrooms so they are flush with the caps. Poke holes into the gill side of the mushrooms inserting the slivers of garlic, cheese, rosemary, and pine nuts into the holes. Mix the balsamic vinegar, salt, and pepper (add basil if desired). Place the mushrooms in a baking dish gill side up and pour the marinade on top of the shrooms making sure to coat the bottoms as well. Marinate for somewhere between 30 mins and 3 hrs to maximize the flavor sensation.

    When it's grilling time - hit them for about 3 mins face side down on high and flip them on their backs for another 4-6 mins. If you're feeling like a grilling superstar - you can turn at a 45 degree angle after about 2 mins to work some grill marks.

    I was extremely pleased at how well these turned out and will definitely make this a regular in the dinner rotation. Plugging the ingredients into the 'shrooms takes a little bit of time but pays off big in flavor points. I'll give this one 5 stars.

    Sunday, November 05, 2006

    Grilled Salmon and Potato Pomegranate Salad


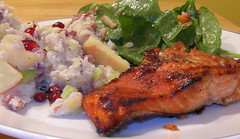
    Being the shameless Harris Teeter bargain shopper that I am, I came across some strong value plays for both Alaskan Sockeye Salmon and pomegranates. As far as cooking them up, the salmon was pretty intuitive but I had to work a little more to find something to make with pomegranates

    Rating wise - I'm giving the Salmon 4 stars and the Potato/Pomegranate salad 3 stars . The salmon was bursting with flavor and easy to prepare. The salad was very tasty as well and very distinctive looking but honestly, I'd probably prefer a kickin' more traditional potato salad instead.

    Grilled Salmon
    Take a large fillet of salmon and cut into pieces and marinade in 1/3 cup soy sauce and 1/3 cup maple syrup in a flat dish flesh side down. After marinating for about an hour - grill on high on ye old gas grill for 3 mins a side.

    Potato Pomegranate Salad
    2 pounds red potatoes, scrubbed
    1/2 cup sour cream
    2 tablespoons red wine vinegar
    salt and freshly ground pepper
    1 red onion, diced
    1 stalk celery, diced
    1 apple, peeled, cored and diced
    1/2 cup pomegranate seeds
    1/4 cup extra-virgin olive oil

    Place the potatoes in a pot, and add enough cold water to cover. Bring to a boil, and cook until fork-tender, about 15 minutes. Meanwhile, in a large bowl, combine the sour cream and vinegar, season with salt and pepper, mix, and set aside. Drain the potatoes, and add to the bowl with the sour cream mixture. Using a fork, lightly press down on the potatoes to slightly mash them as you mix. Add the celery, apple and pomegranate seeds, and toss well. Drizzle with the olive oil, and adjust seasonings.

    Sunday, October 01, 2006

    Grilled Veggie Pasta


    2 thin (Japanese) eggplants
    2 red peppers
    several tomatoes
    1/2 yellow onion, diced
    3 garlic cloves, minced
    1/4 c fresh basil, chopped
    1 T fresh rosemary, chopped
    red wine vinegar
    feta cheese
    chunky pasta, cooked (we used mini farfalle)

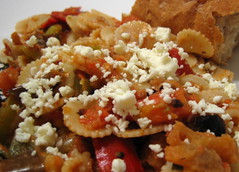
    Grill eggplant, peppers, and tomatoes until skins are charred and come off easily. Chop the vegetables coarsely (trying not to lose any of the juice). Saute the onions and garlic, then add the grilled veggies, basil, and rosemary. Season to taste with salt, pepper, and a splash of red wine vinegar. Toss with pasta and top with crumbled feta.

    A good basic pasta dish. 3 1/2 stars.

    Sunday, September 17, 2006

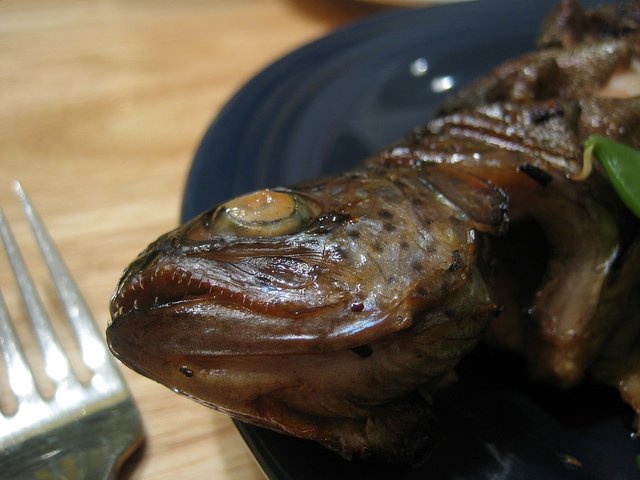
    Grilled Rainbow Trout


    A few whole trout (no guts if you can get it that way)
    4 tbsp. butter
    1/4 c. lemon juice
    1/4 c. soy sauce
    3/4 tsp. ground ginger
    1/2 tsp. cracked peppercorns

    I marinated the fish before cooking for about an hour in a plastic bag with some olive oil and lemon juice.

    Melt the butter in small saucepan. Add lemon juice, soy sauce, ginger and pepper. Brush inside and outside of fish generously with the butter mixture.

    You can place the fish on aluminum foil or directly on the grill and cook on medium or indirect heat. It's a tricky proposition turning the fish on the grill - I'd recommend flipping from the head to the tail. Cook until fish flakes easily.

    Saturday, September 09, 2006

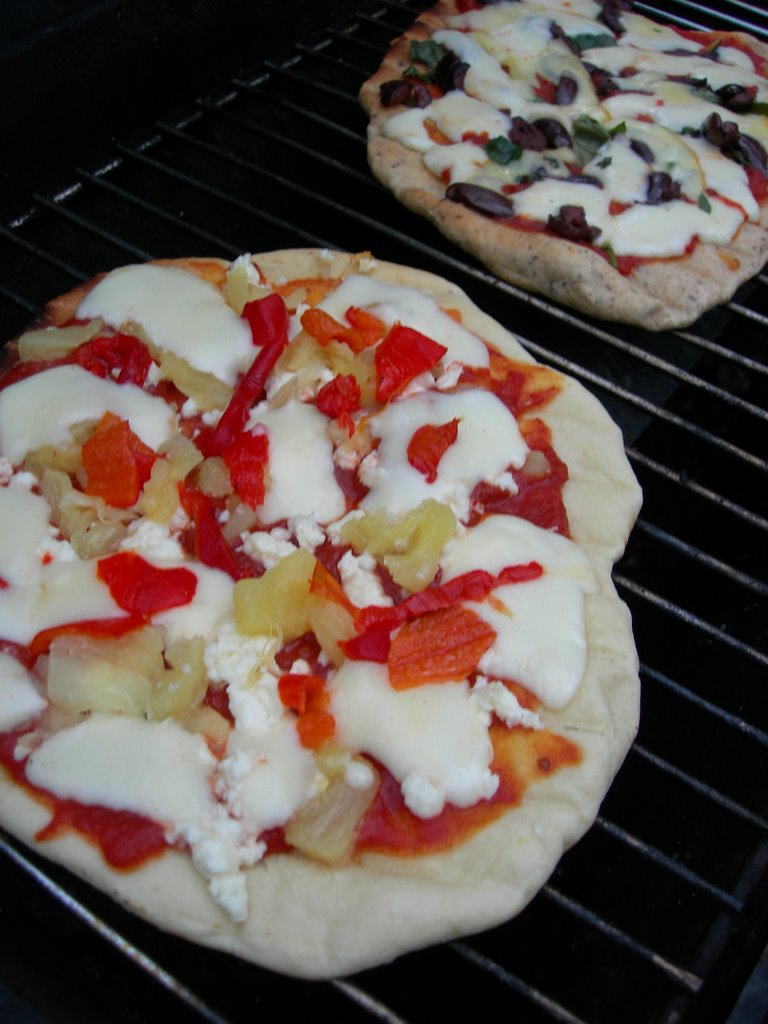
    Grilled Pizza

    Prior to grill time ensure that the grill itself is greased down with some vegetable oil or olive oil. This will go a long way towards ease of preparation and ensuring your pizza gets into your mouth instead of becoming a cindery, blackened mess.

    Brush one side of the dough lightly with olive oil and place the pie oiled side down on the grill until the dough begins to brown (between 5- 10 mins). Once browned - flip the 'za and apply sauce and ingredients. You'll need to take care to apply lightly as a set of soggy toppings may cause the pizza to hemorrhage.

    Some suggested combinations -- generally, the rule of three applies to both pizza and omelets - limit your ingredients to maximize flavor. Otherwise, you run the risk of creating a muddled, soupy mess. In the case of pizza - the base cheese and sauce are excluded from the equation.

    Ingredient combinations
    Pineapple, Roasted Peppers, Feta
    Kalamata olives, grilled mushrooms, rosemary
    Grilled tomatoes, basil

    You get the idea but it's hard to go wrong with good ingredients. The grilled goodness kicks up normal pizza consumption to a new level. 4 1/2 stars - deducting a 1/2 star for the grill burns I suffered as a neophyte pizza flipper. Use your spatula.

    Saturday, September 02, 2006

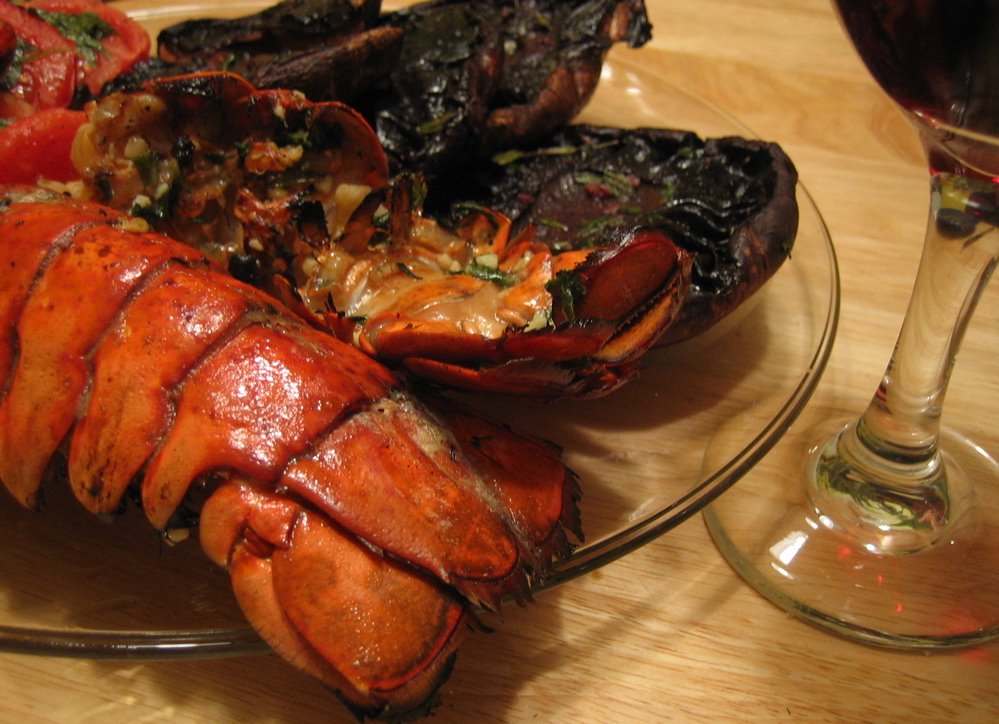
    Lobster tails!


    Ingredients

    Lobster tails
    Garlic, minced
    Olive oil
    Black pepper
    Salt
    Lemon juice

    After rinsing and drying, take a sharp knife and "butterfly" the tails down the center of the back leaving the bottom shell intact. Then gently pry open the tail to expose the meat.

    Combine the garlic, salt, pepper, olive oil in a sauce pan and simmer for 2-3 minutes. Allow to cool and marinate the lobster tails for 30 minutes in the refrigerator.

    Butter-Basil-Baste

    Melted butter
    Garlic, minced
    Basil

    In the same sauce pan, combine the butter, garlic and basil and simmer 2-3 minutes. When ready to cook, coat the meat with your butter basil baste and grill meat side down for 2-3 minutes until slightly browned. Turn them over onto their shells and cook until meat has lost its transparency and is opaque. Do not overcook. You may baste several times with your butter basil baste while the tails are cooking. Serve immediately.

    5 succulent, buttery stars